Objective
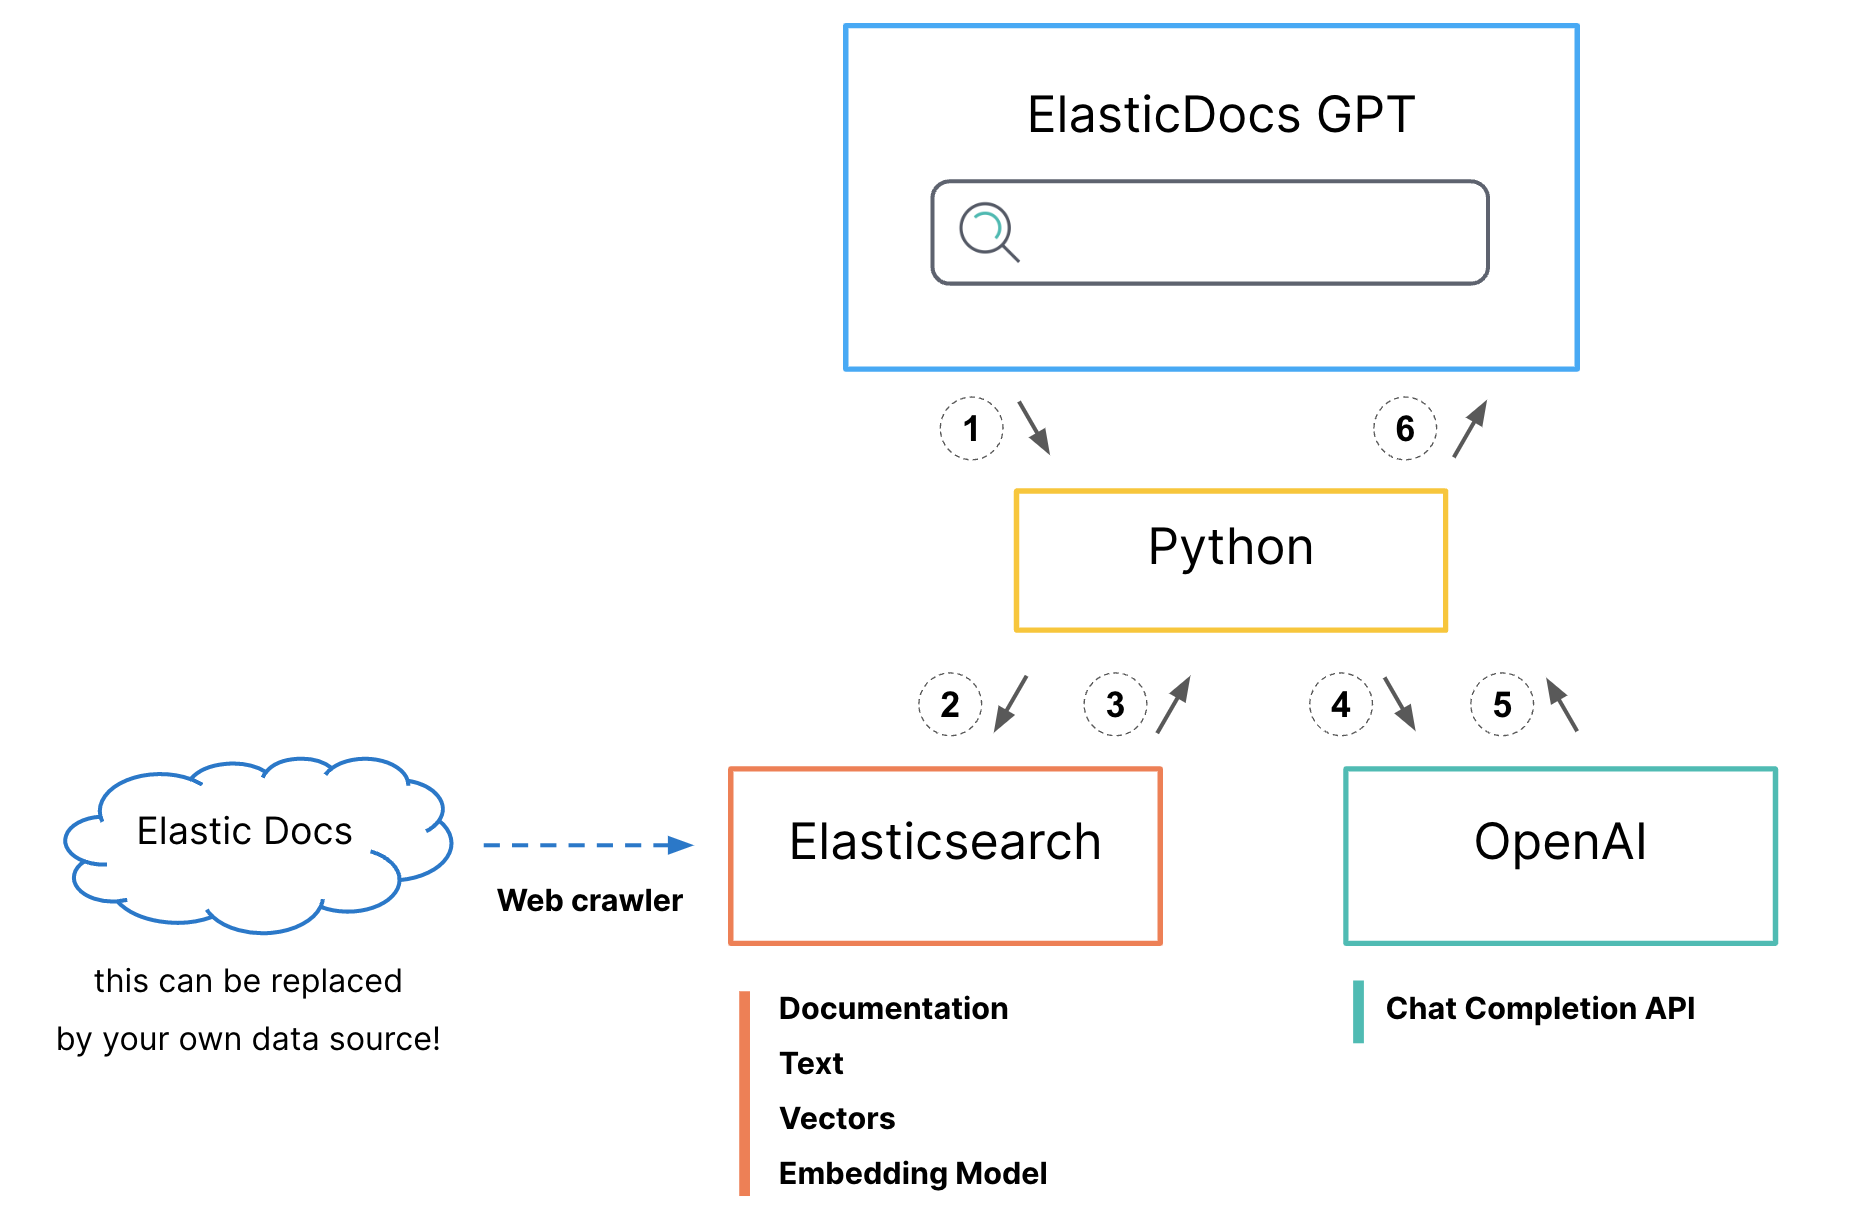
In this hands-on workshop, We will learn how to connect ChatGPT to proprietary data stores using Elasticsearch and build question/answer capabilities for your data. In a demo, We will quickly convert your website, FAQ, or any documentation into prompt chat where your user can directly ask a question on your data.
Flow
Prerequisites
You have used ChatGPT :)
Good to have understanding around Elasticsearch (Not mandatory, Introduction will be cover)
System + Internet connection
OpenAI account with API key - Create new one from https://platform.openai.com/account/api-keys. Make sure it having free credits.
Without local setup
Google account to use google Colab.
Render account.
Local setup
Git - Install it from https://git-scm.com/downloads
Docker - Good to have. Install it from https://docs.docker.com/engine/install/.
Having basic python knowledge will be good.
For a workshop we going to follow without local setup.
1. Setup cluster
Visit cloud.elastic.co and signup.
Click on Create deployment. In the pop-up, you can change the settings or leave it default.
We need to add machine learning instance. For that, simply click on “advance settings” .
Go to “Machine Learning instances” -> click on “Add Capacity” and select at least 4GB ram capacity.
Finally click on “Create deployment”.
Download / Copy the deployment credentials.
Once deployment ready, click on “Continue” (or click on Open Kibana). It will redirect you on kibana dashboard.
2. Deploy Model
ELSER Model by Elastic (Recommended)
Go to the kibana panel. Navigate to Menu -> Machine Learning (In Analytics section). In left menu, Click on Trained Models (In Model Management Section).
- ELSER can be found in the list of trained models.
- Click the Download model button under Actions.
- After the download is finished, start the deployment by clicking the Start deployment button.
- Provide a deployment ID, select the priority, and set the number of allocations and threads per allocation values.
- Click Start.
Third party model
We are going to use all-distilroberta-v1 model hosted on a hugging face. Lets import on an elastic cluster using eland.
Get your credentials ready
cloud_id: Visit “cloud.elastic.co” -> Navigate to your deployment and click on “manage”. Simply copy Cloud ID and save it.cloud_user:elasticcloud_password: You will get it from step 1.6. If you forget to save, Simply click on “Action” -> “Reset password”. (Username will beelasticonly)hf_model_id:sentence-transformers/all-distilroberta-v1(Go to model page on huggingface & copy the IDsentence-transformers/all-distilroberta-v1)
Now there is two way, You can upload the model using docker as well as Google colab.
Using Google Colab (Recommended)
Simply click on below link. It will open ready made notebook. You just need to click on play button to run notebood.
![]()
Using Docker
We’re going to use docker for import model to the elastic cluster
 git clone https://github.com/elastic/eland.git
 cd eland
docker build -t elastic/eland .docker run -it --rm elastic/eland eland_import_hub_model \ --cloud-id <cloud_id> \ -u elastic -p <elastic_cloud_password> \ --hub-model-id sentence-transformers/all-distilroberta-v1 \ --task-type text_embedding \ --startLet’s wait till the model gets uploaded without any error.
Exit from
elandfolder.cd ..
Verify uploaded model
Go to the kibana panel. Navigate to Menu -> Machine Learning (In Analytics section). In left menu, Click on Trained Models(Model Management Section). You must see your model here in the “Started” state.
In case if a warning message is displayed at the top of the page that says ML job and trained model synchronization required. Follow the link to Synchronize your jobs and trained models. Then click Synchronize.
3. Crawling private data
- Click on Menu -> Enterprise Search -> “Create an Elasticsearch index” button
- Click on Web crawler.
- Add index name (It will add prefix search) and hit “Create index”. In my case index name is (search-ashish.one)
- Go to “Pipelines” to create a pipeline.
- Click “Copy and customize” in the Ingest Pipeline Box.
- Click “Add Inference Pipeline” in the Machine Learning Inference Pipelines box.
- Give the unique pipeline name e.g. “ml-inference-ashish-one”
- Select a trained ML Model from the dropdown “sentence-transformers__all-distilroberta-v1” (For ELSER choose “.elser_model_1”)
- Select “title” as the Source field and set “title-vector” as a destination. You can specify your own destination field name. (In case of ELSER, just select the “Source” field e.g title, body_content)
- Let’s click on “Continue” and move to the Test(Optional) tab. Click on “Continue” again.
- At the Review stage let’s click on “Create pipeline”.
- (Skip this for ELSER) Go to Menu -> Management -> Dev Tools. Let’s create a mapping
POST <index_name>/_mapping
{
  "properties": {
    "<vector_field_name>": {
      "type": "dense_vector",
      "dims": 768,
      "index": true,
      "similarity": "dot_product"
    }
  }
}
In my case mapping will be:
POST search-ashish.one/_mapping
{
  "properties": {
    "title-vector": {
      "type": "dense_vector",
      "dims": 768,
      "index": true,
      "similarity": "dot_product"
    }
  }
}
Paste above query in cosole and hit on play button.
- Go to Enterprise search -> indices -> your_index_name -> Manage Domains. Enter the domain (e.g. https://ashish.one. You can add your own domain) to crawl and hit “Validate Domain”.
- If everything is fine, simply click on “Add domain” and start crawling by click on Crawl -> Crawl all domains on this index.
- Go to Enterprise Search -> Indices. You should see your index name.
4. Setup Interface
** Get your credentials ready **
cloud_id: Visit “cloud.elastic.co” -> Navigate to your deployment and click on “manage”. Simply copy Cloud ID and save it.cloud_user: elasticcloud_password: You will get it from step 1.6. If you forget to save, Simply click on “Action” -> “Reset password”. (Username will be elastic)openai_api: Create open ai api key from https://platform.openai.com/account/api-keys.es_index: Index name which we created in step 3.3. (search-ashish.one)vector_field: The field which we’ve set for destination at step 3.9. i.e. title-vector
Setup on local with Docker
- Clone
git clone https://github.com/ashishtiwari1993/elasticsearch-chatgpt.git
cd elasticsearch-chatgpt
- Replace credentials in
Dockerfile
Open Dockerfile and change below creds
ENV openai_api="<open_api_key>"
ENV cloud_id="<elastic cloud id>"
ENV cloud_user="elastic"
ENV cloud_pass="<elastic_cloud_password>"
ENV es_index="<elasticsearch_index_name>"
ENV chat_title="<Any title for your page e.g. ashish.one GPT>"
ENV vector_field="< specify vector field where embedding will be save. e.g. title-vector>"
- Build
docker build -t es-gpt .
- Run
docker run -p 8501:8501 es-gpt
Simply visit on localhost:8501
Setup on Render with Docker
Signup on https://render.com.
Create Web Service.
Go to Public Git repository section and add below repo url
https://github.com/ashishtiwari1993/elasticsearch-chatgpt
Hit on Continue.
Add Name and select Free Instance Type.
Click on Advanced and Add Environment Variable
openai_api="<open_api_key>"
cloud_id="<elastic cloud id>"
cloud_user="elastic"
cloud_pass="<elastic_cloud_password>"
es_index="<elasticsearch_index_name>"
chat_title="<Any title for your page e.g. ashish.one GPT>"
vector_field="< specify vector field where embedding will be save. e.g. title-vector>"
- Finally click on Create Web Service
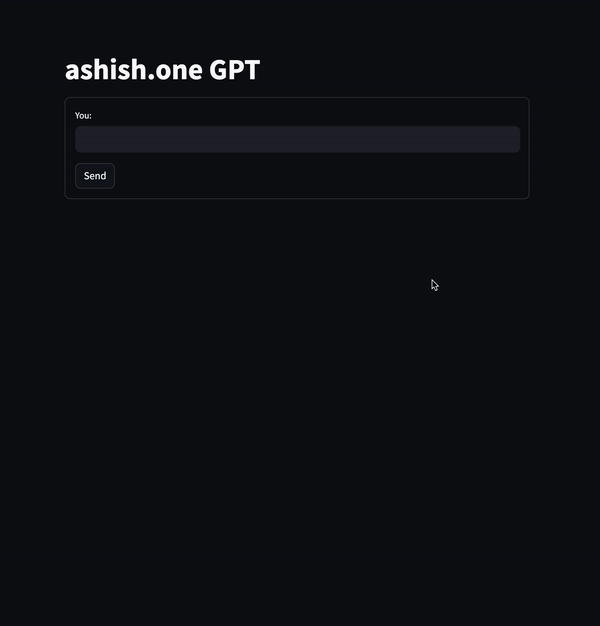
Output