Introduction
This article is not containing the detailed procedure for installation but listed some challenges which you can face while installing the arch Linux. Arch Linux is one of the Linux distributions, Which gives you full control over your application and OS. You have complete freedom to install or what to keep. Unlike the other distribution like Ubuntu, Centos, etc. It doesn’t come with pre-loaded applications or software.
Though Arch wiki has a detailed explanation of the installation process I faced some challenges whose solution was not easily available. I am listing a few here and will keep updating this post as I move forward.
In this post I am not going to cover the installation steps, You will get a better explanation on the arch wiki.
Machine Configuration
Hardware
RAM: 2GB
Disk: 500
BIOS configuration
Secure boot: disabled
Legacy boot: enabled
Boot Mode: UEFI
Challenges
1. What should be my disk partition ?
1.1 Check Boot mode
You need to check installation guide, Refer step Verify the boot mode.
In a live environment, you need to check first what is your boot mode.
ls /sys/firmware/efi/efivars
If the command shows the directory without error, then the system is booted in UEFI mode. If the directory does not exist, the system may be booted in BIOS (or CSM) mode.
So my machine’s boot mode is UEFI.
1.2 How to create partitions?
I would recommend using cfdisk command to create the partition. Which gives you good visualization.
My SCSI Disk is dev/sda.
1.3 Types of Partition
You need to create 3 types of partition as shown below:
| Mount Point | Partition | Partition Type | Size |
|---|---|---|---|
| /mnt/boot | /dev/sda1 | EFI System | 1G |
| [SWAP] | /dev/sda2 | LINUX Swap | 4G |
| /mnt | /dev/sda3 | LINUX Filesystem | 460G |
Here on my machine i have created 3 partition name dev/sda1, dev/sda2, dev/sda3. This name can be different.
This is how you need to create the partition with the help of the cfdisk command.
1.4 Mount the partition
Format the partition
mkfs.ext4 /dev/sda3
mkswap /dev/sda2
mkfs.fat -F 32 /dev/sda1
Mount the partition
mount /dev/sda3 /mnt
mount /dev/sda1 /mnt/boot
swapon /dev/sda2
2. Install Bootloader
I have decided to install a grub bootloader on my machine. You can decide on this wiki page.
2.1 Install GRUB
pacman -S grub
2.2 Generate Grub config
grub-install --target=x86_64-efi --efi-directory=/boot --bootloader-id=GRUB
2.3 Reboot the system
exit
umount /dev/sda3
reboot
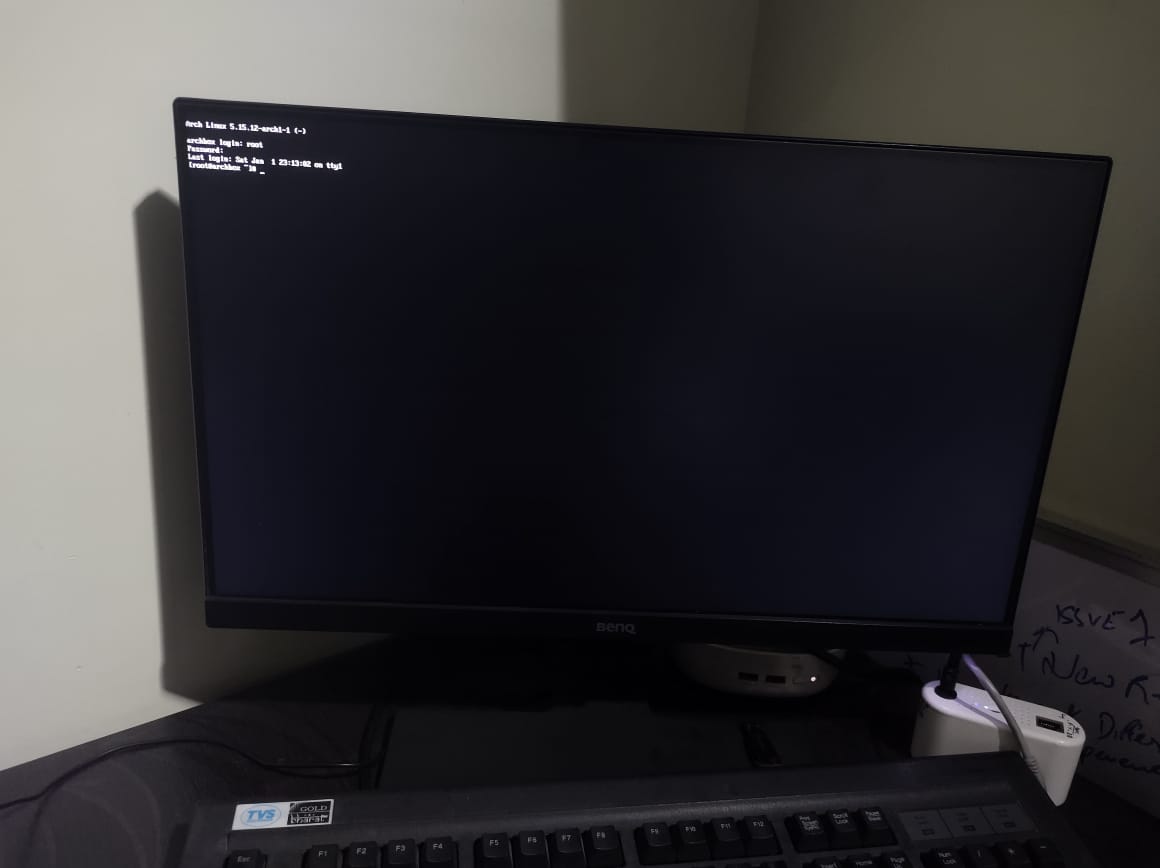
3. How to login again with Live bootable Arch device (USB/CD etc.)
Sometimes we need to install some package with a live environment only. In such a case, you can prefer these steps.
Attach the live bootable device and choose the specific device in the boot order. Once you are logged in, Just perform the below commands.
mount /dev/sda3 /mnt
mount /dev/sda1 /mnt/boot
swapon /dev/sda2

arch-chroot /mnt
Once you are in Than you can perform any operation on your installed Arch OS.
4. Install NetworkManager
Please refer to challenge #3 to log in with the live environment. Once you successfully log in, Perform the below commands:
pacman -S NetworkManager
systemctl start NetworkManager
systemclt enable NetworkManager
Simply check with ping if you connected with a LAN connection.
ping google.com
Note: Please start and enable the Network Manager after reboot. It will not start on first time login.
5. Install Broadcom Wireless
pacman -S linux-headers
pacman -S broadcom-wl-dkms
Reboot the system.
6. Desktop Environment Arch
To run any desktop environment, Need to install Display Manager. First, we will install LXDM (display manager).
6.1 LXDM
pacman -S lxdm
systemctl start lxdm
systemctl enable lxdm
6.2 LXDE
LXDE is a lightweight desktop. As my system has 2GB RAM, I have tried this.
pacman -S lxde
Reboot the system.
6.3 XFCE4
Xfce is a lightweight and modular desktop environment currently based on GTK 3. To provide a complete user experience, it includes a window manager, a file manager, desktop and panel.
pacman -S xfce4 xfce4-goodies
Edit lxdm.conf
Edit below line
session=/usr/bin/startlxfce4
Reboot the system.
7. Connect to WIFI
You need to install Network Manager and wireless driver first. You can refer step 4 & 5.
Once done with proper installation you can connect to wifi using:
nmtui
8. Stuck on GRUB window while booting on arch linux
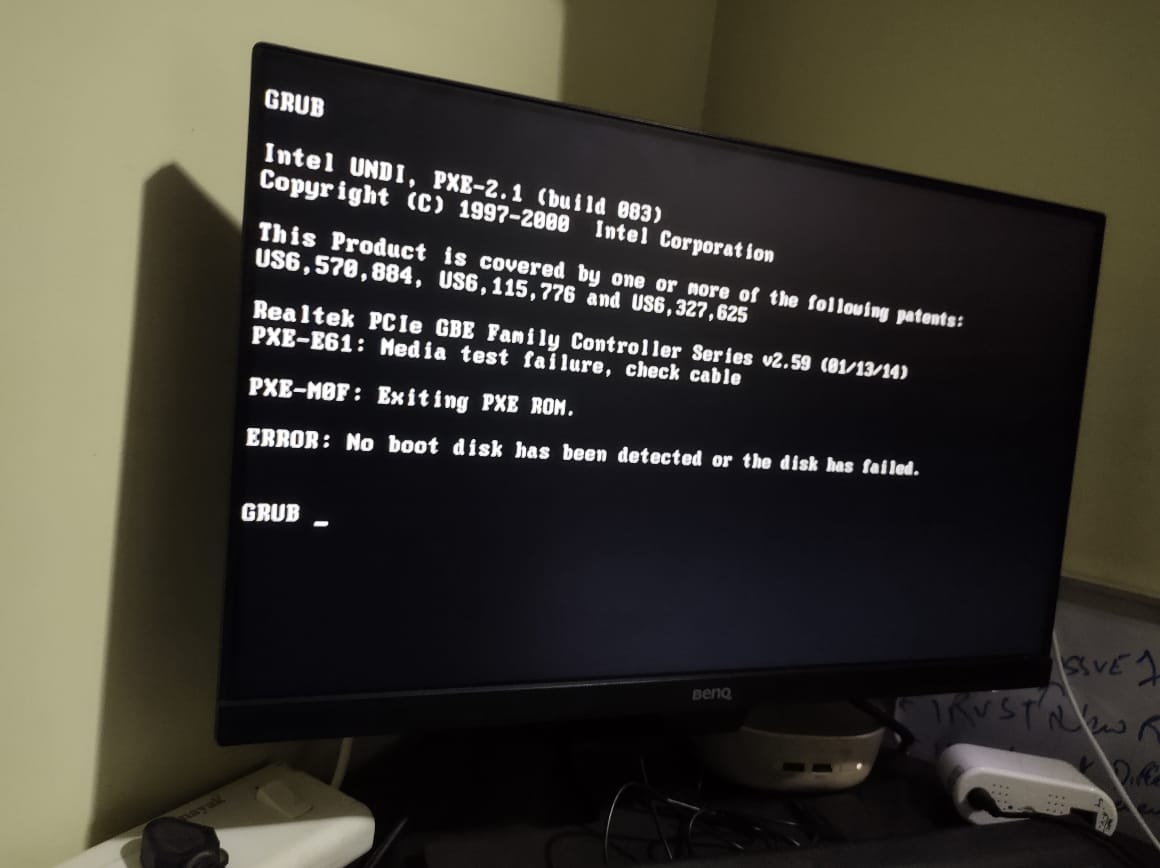
It seems my bootloader was not configured properly. Re Attached the live bootable device and perform steps 3 and then 2.
Reboot the system.
9. Error: [ TIME ] Timed out waiting for device /dev/disk/by-uuid/
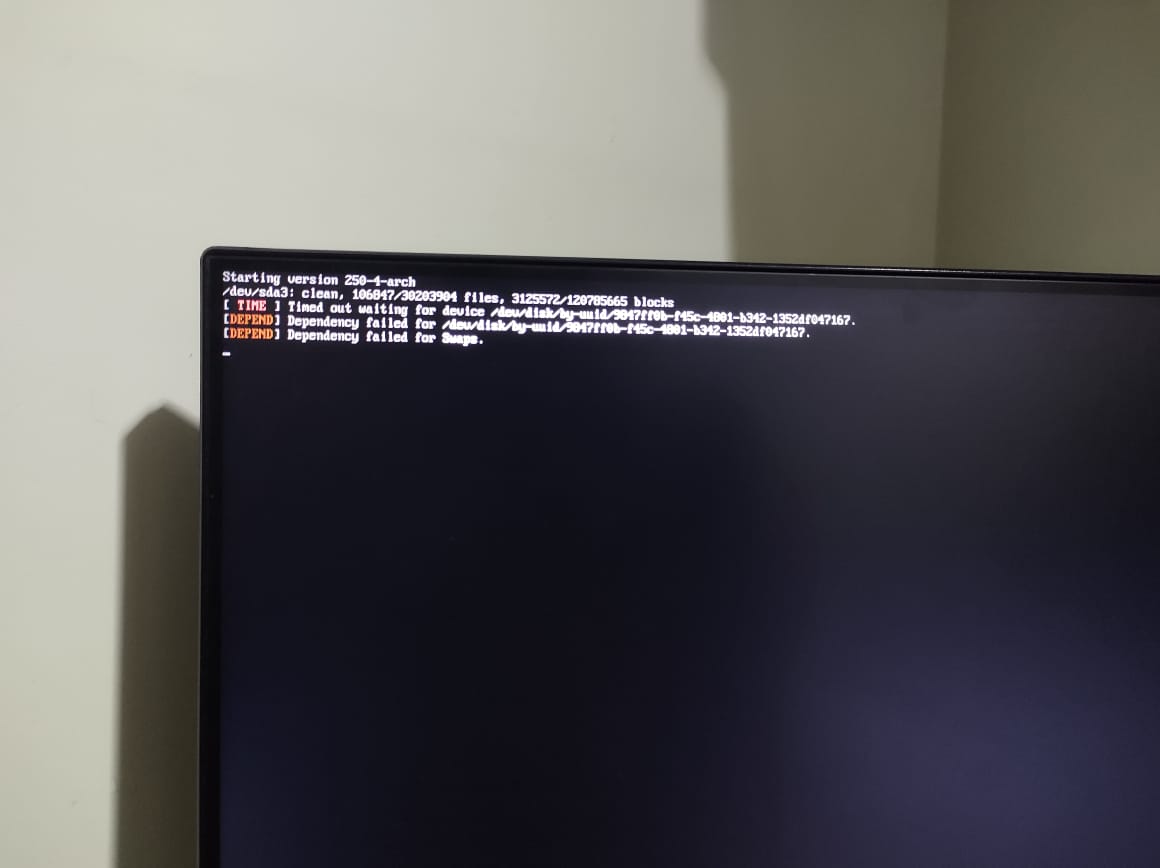
Please perform step 3.
Check UUID of partitions
lsblk -l
Cross-check whether the above UUIDs and mentioned UUIDs in /etc/fstab should be the same.
vim /etc/fstab
Update UUID accordingly on the above file. Save and exit.
Reboot the system.